
Wow... I went by the garage last night to refill the heater again (turns out this needs to be done for ten days from when the concrete was poured) and saw that the walls between the finished area on the first floor and the garage section were put up. It's amazing how much bigger everything seems after walls are up! I still can't entirely wrap my head around why divisions in a space make it seem larger, but they definitely do.
I was most impressed with the cieling height. Now that the area's a bit more narrow the fact that the cielings in the garage are going to be like 12 feet or something like that is really clear. The garage is going to seem massive!
That's all for now. I have meetings at the garage for lunch today for the HVAC and tomorrow for the bi-weekly construction meetings, so I'm sure I'll be posting new pix soon.
Tuesday, January 30, 2007

Sunday, January 28, 2007
Siding Choices...
Up till the last couple of weeks, I'd always envisioned the second floor to be covered in mill finish, plain, silver looking steel corrugated siding. Recently though, I've noticed a number of other places in the area starting to use this and it's made me reconsider. Although I like the industrial look a lot, I also don't necessarily want my house grouped in with the other new construction in the area. I started looking at alternatives this week, and found that alternate colors and patterns are not as much more as I'd thought.
I also was informed around this time that the exact material which I'd specified before would weather and eventually rust despite the fact that it's supposed to be coated not to. The whole rusting thing is awesome, but I don't want to worry about dripping rust on my neighbors properties and on mine or having to replace it if it rusts too much.
Soooo, after some research I think I'm going to be using McElroy Metals. As of right now I'm trying to decide between these two colors:
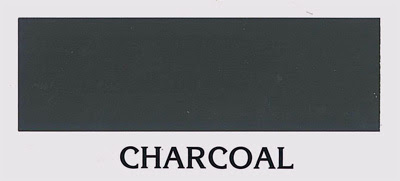

(Please note, the blue color's a bit hard to reproduce, on the computer; even the scan of the color chart that I made is off a bit)
I like the blue cause it's bold, but not overly so... though the charcoal has a cool ominuous feel to it, which I like as well. To try and get a feel for what color to use as well as what rib-pattern to use for the corrugated siding I did some photoshopping of this picture:


I think I've decided to go with a corrugation pattern that repeats every 12" as opposed to a smaller corrugation that repeats every 3". I think the larger pattern gives it more of a "large commercial building" feel as opposed to an industrial feel. My mom was concerned that only having a small number (20) of ribbed patterns going down the front would be wierd because of the way the lines would intersect with the window and door openings. I photoshopped both the small and large patterns over the front elevation plan and found that I'm happy with just a few ribs.


Well, if you're still reading at this point, then hopefully you have an opinion on which of the various things I've laid out look best. Any thoughts? Leave em in the comments if you do.
I also was informed around this time that the exact material which I'd specified before would weather and eventually rust despite the fact that it's supposed to be coated not to. The whole rusting thing is awesome, but I don't want to worry about dripping rust on my neighbors properties and on mine or having to replace it if it rusts too much.
Soooo, after some research I think I'm going to be using McElroy Metals. As of right now I'm trying to decide between these two colors:

(Please note, the blue color's a bit hard to reproduce, on the computer; even the scan of the color chart that I made is off a bit)
I like the blue cause it's bold, but not overly so... though the charcoal has a cool ominuous feel to it, which I like as well. To try and get a feel for what color to use as well as what rib-pattern to use for the corrugated siding I did some photoshopping of this picture:


I think I've decided to go with a corrugation pattern that repeats every 12" as opposed to a smaller corrugation that repeats every 3". I think the larger pattern gives it more of a "large commercial building" feel as opposed to an industrial feel. My mom was concerned that only having a small number (20) of ribbed patterns going down the front would be wierd because of the way the lines would intersect with the window and door openings. I photoshopped both the small and large patterns over the front elevation plan and found that I'm happy with just a few ribs.


Well, if you're still reading at this point, then hopefully you have an opinion on which of the various things I've laid out look best. Any thoughts? Leave em in the comments if you do.
Concrete Pouring and Kerosene Fun
The colored concrete got poured this past Wednesday after a little bit of drama. At first there was a problem because of the temperature requried by the concrete color, but in the end we've been using a kerosene "bullet" heater to keep the area above freezing temperature. It's now Sunday and I've been going down every night and during the day if the construction guys aren't there to refill the heater every 8-10 hours or so. Kerosene. Is. Smelly.
Although the concrete's hard, the full cure takes a while and you can see it clearly by the fact that the color of the concrete is still changing somewhat. Here's a picture of the concrete the night after it was poured:

I'm extremely jealous of this place which is on Sidney and 16th I think. They're using corrugated steel halfway on it's way to rusting, large painted metal panels, huge windows and are using only portions of the existing building, using the rest to define outside areas, similar to what I'm doing... tho much more impressive.

Tuesday, January 23, 2007
Whoops, Sorry Jen
Jen just made me realize I haven't yet talked about the robot room w/ pea green carpet.
Here's a sneak preview:
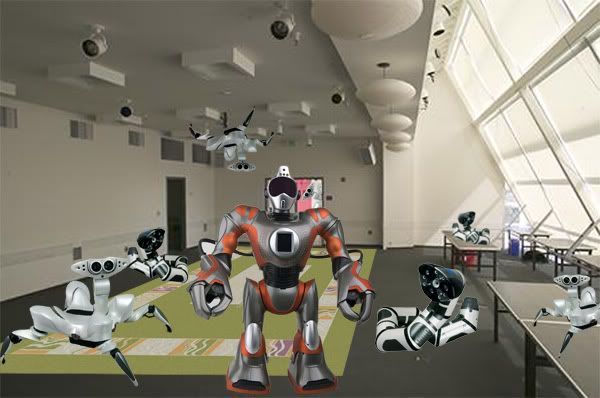
Here's a sneak preview:
Monday, January 22, 2007
Bigger Pictures = Better Pictures?
Anybody have an opinion on which is better:
-the small picture with a link to a hi-res version of it
or
-the medium sized pictures with no link
?
Leave em in the comments if you do.
Thnx.
Mgmt.
-the small picture with a link to a hi-res version of it
or
-the medium sized pictures with no link
?
Leave em in the comments if you do.
Thnx.
Mgmt.
It Gets a Face
January 19, 2007
Well, I've just about done it: gotten this blog up to date.
Last week the front of the house really started to get some form and the first peek at how it's going to look:
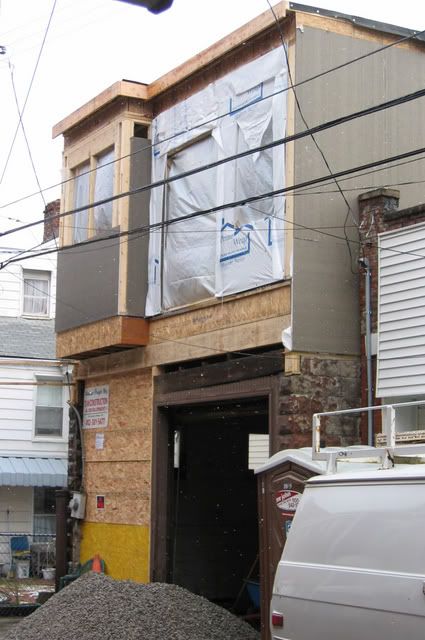
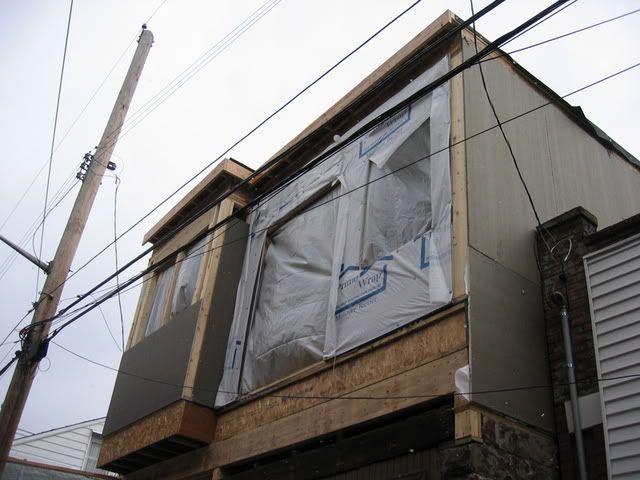
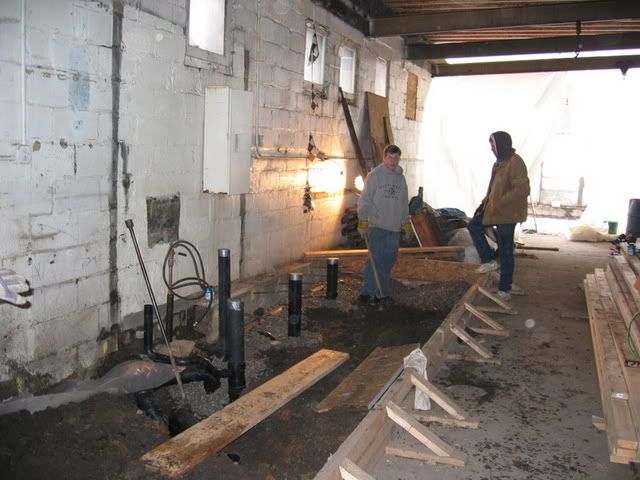
After some delays, the first floor plumbing was started. When the plumber came he found that the trap in the garage floor drain was draining slowly. The inspector who checked out the pipes before I got the place had the same problem. We decided to have him replace it for $500. I didn't really want to do that because I don't foresee myself using this drain much, but considering the drain is about to be permanently encased in concrete.... it's probably a good idea.
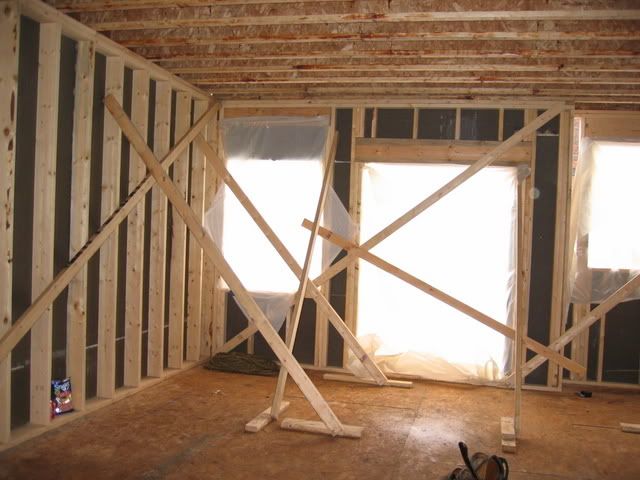
Here's the view from the front of the second floor looking towards the back:
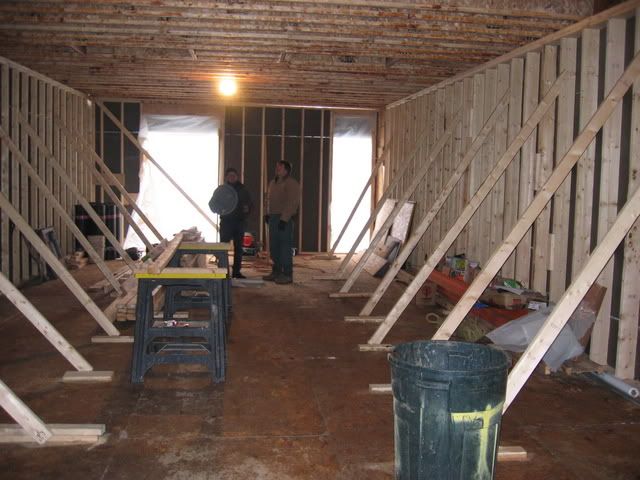
And looking from the middle of the second floor towards the front. The right window will be part of the bathroom and sectioned off by a wall and door.
Remember the neighbors who delayed the start of construction by about 9.5 months costing me bunches of rent money and lawyer fees? Well, check out their "great view" that my house is blocking:
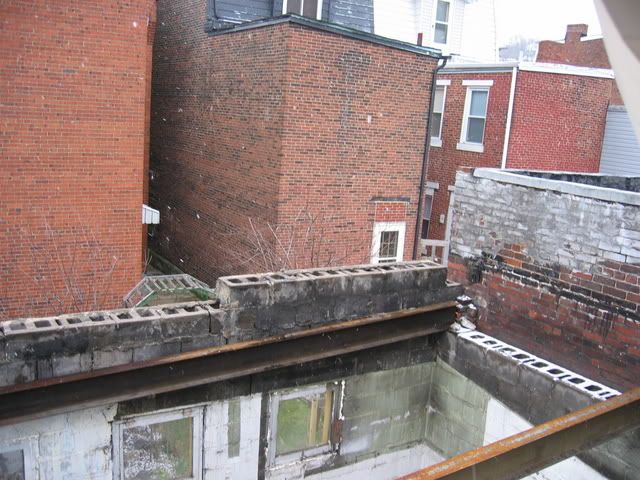
Ummm.... yeah, somehow I think they're gonna live.
Well, I've just about done it: gotten this blog up to date.
Last week the front of the house really started to get some form and the first peek at how it's going to look:
After some delays, the first floor plumbing was started. When the plumber came he found that the trap in the garage floor drain was draining slowly. The inspector who checked out the pipes before I got the place had the same problem. We decided to have him replace it for $500. I didn't really want to do that because I don't foresee myself using this drain much, but considering the drain is about to be permanently encased in concrete.... it's probably a good idea.
Here's the view from the front of the second floor looking towards the back:
And looking from the middle of the second floor towards the front. The right window will be part of the bathroom and sectioned off by a wall and door.
Remember the neighbors who delayed the start of construction by about 9.5 months costing me bunches of rent money and lawyer fees? Well, check out their "great view" that my house is blocking:
Ummm.... yeah, somehow I think they're gonna live.
Second Floor Walls
January 11, 2007
About a week later I stopped by the garage to see that the second floor side walls had been built and raised. It was a nice day, so of course I had to snap a pic:

About a week later I stopped by the garage to see that the second floor side walls had been built and raised. It was a nice day, so of course I had to snap a pic:

Sunday, January 21, 2007
Constructing the New Floor
January 6, 2007
When I visited to take more pictures in the new year I was happy to find that the cieling of the first floor/floor of the second floor was up and the frame wall of the second floor was built and waiting to be stood up.

This shows the cantilevered bathroom section which will bump out from the front.

Trusses for the cantilevered section go lengthwise in relation to the house, not across the width like the other beams.

The constructed roof looking from the back to the front.

This is a little video I took while on the second floor that shows some of the neighboring backyards etc.
There's a huge, old, run-down police station across the street that I talk about a bit in this video.
When I visited to take more pictures in the new year I was happy to find that the cieling of the first floor/floor of the second floor was up and the frame wall of the second floor was built and waiting to be stood up.
This is the front (obviously).

This shows the cantilevered bathroom section which will bump out from the front.

Trusses for the cantilevered section go lengthwise in relation to the house, not across the width like the other beams.

The constructed roof looking from the back to the front.

Rooftop view from the back of the building towards the front.

This is a little video I took while on the second floor that shows some of the neighboring backyards etc.
There's a huge, old, run-down police station across the street that I talk about a bit in this video.
Concrete Preparation
I took these pics a couple weeks later when I stopped by the site with some of my co-workers. All the demolition was complete, all the concrete which needed broken up and removed was gone, the walls for the concrete pour had been constructed, and the framing was being started on top of the side walls.

The concrete that's being poured on the first floor is going to be colored and polished. A dye is added to the concrete when it's being mixed, then afterwards a sealer is added to it and when it's all dry and ready, it's polished smooth. In the end it almost looks like marble. The color I chose is "rawhide".


The concrete that's being poured on the first floor is going to be colored and polished. A dye is added to the concrete when it's being mixed, then afterwards a sealer is added to it and when it's all dry and ready, it's polished smooth. In the end it almost looks like marble. The color I chose is "rawhide".

Contractor Selection and Demolition
December 16, 2006
After getting a three bids on the project, I decided to go with Team Construction. Their bid came in a little bit more than the lowest bid, and a whole lot less than the highest bid. Through her architecture work, my mom's worked with a number of contractors, so she was able to choose only quality people to even give us prices. The owner/head of Team Construction is a guy named.... Guy. He's helped out since the begining of this process a lot, giving advice and approximations of the amount of effort that would go into each one, etc etc. Although this wasn't the only reason we chose to go with Team Construction, it was certainly a factor.
Demolition of the interior and roof of the garage happened within days of signing up with Team. Here are some pictures and video of the initial stages of demolition.


Subscribe to:
Posts (Atom)